Introduction
The current software industry is fast-paced and therefore requires speed, reliability and consistency. With an automated build, test, and deployment process, your teams will be able to deliver more quality and increase the frequency of delivery. It is the place where Azure DevOps Pipelines are implemented. Using pipelines in Azure DevOps allows you to write your continuous integration (CI), continuous delivery/deployment (CD) processes, reproducible them, and provide quality gates and accelerate your development process.
The paper will explain the purpose of workflow automation, how to use the Azure DevOps Pipelines, the appearance of an automated workflow, and then explain how it can be applied in real life: configure your repo, create a YAML pipeline, run builds, deploy to environments and tips on how to optimize pipelines.
Learn how to automate your workflow using Azure DevOps Pipelines to boost productivity, streamline CI/CD, and improve deployment efficiency.
Why Automate Your Workflow?
It is worthwhile to first have an idea of why automation is so desirable before we get to the how-to.
Speed & Feedback
Manual and error-prone processes are created for builds, tests, and deployments. By using automation, those steps can be shortened, producing faster delivery of projects, quicker feedback and more time saved between coding and seeing it live.
Consistency & Repeatability
A manual process can be different to different individuals; an automated pipeline has the benefit of having every build/test/deploy go through the established process in the same exact manner and enhances repeatability and diminishes the it works on my machine errors.
Quality & Reliability
With integrated automation (testing (unit, integration, UI), gate checks (code quality, security, manual approvals)), you increase the level of confidence that you have before going to production. As an example, the Azure Pipelines can be used to support automated testing and gates.
Traceability & Auditing
Defining your pipeline as code (YAML), storing logs and artefacts, linking deployments to particular versions of the code, will give you traceability: what version was deployed where, who used it, what tests passed, etc., helpful during audits and compliance.
Scale & Collaboration
Manual processes do not scale as the teams increase, as well as the frequency of releases. Pipelines increase in size among agents, between branches, and environments; teams work together more effectively, and you do not have bottlenecks.
That is why the automation of your working process is no longer an option, but a critical part of the modern DevOps.
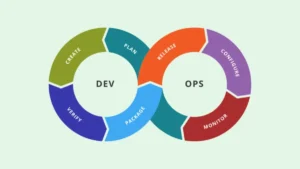
What are Azure DevOps Pipelines?
Overview
The Azure DevOps Pipelines, sometimes referred to as just Pipelines, is an Azure DevOps service that facilitates the building, testing, and deploying of applications. The service is compatible with platforms such as .NET, Java, Node.js, Python, and containers. It also accommodates various OS agents like Windows, Linux, and macOS, and different repositories including Azure Repos, GitHub, and Bitbucket.
Key Concepts
- CI (Continuous Integration): After every change, an automatic code build and test is done. Catch issues early.
- CD (Continuous Delivery/Deployment): Deploy your artefacts automatically in other environments (dev, staging, production) when the build passes tests and gates.
- YAML vs Classic editor Pipelines can be defined either in YAML files (in your repository, hopefully version-controllable, portable, reusable) or by use of the traditional UI editor.
- Stages, Jobs, Steps: A pipeline is comprised of stages. At each stage, we have jobs, and at each job, we have steps/tasks performed by an agent.
- Triggers: You indicate the triggering of the pipeline (on code commit, pull request (PR), schedule, or manual).
- Environments & Approvals: In the example of CD, the defined environments (dev, staging, prod) can be provided with the approval gates before the deployment.
- Artefacts: This produces a product that can be consumed by the next step, e.g. deployable package, container image.
Basically, Azure Pipelines offers you the engine to automate your process up to the point of code commit to live production.
Designing an Automated Workflow
The example of a high-level workflow that can be automated is the following:
- The developer posts code in the repository.
- CI build triggers (build tests).
- Artefact is made and saved under the event of successful build/tests.
- Child pipeline triggers (or gated) to insert the artefact into the dev environment.
- Staging gates would be either manual or automatic.
- Production is prepared to be rolled out.
- Failures Monitoring/rollback mechanisms.
This would be mapped to Azure Pipelines:
- CI stage(s) + CD stage(s) are defined by a YAML file.
- Branch triggers main, release, feature/.
- Depending on the environment, variables and secrets are configured in a specific fashion.
- Agent pools execute jobs.
- Pushes to Azure App Service, Kube, VMs, etc.
- Approval/gate separates the stages and makes sure that the passage is safe.
Within Microsoft, as demonstrated in the tutorial of creating a multistage pipeline, a pipeline may consist of a single Build, Dev, Staging stage with dependencies and conditioning.
Step-by-Step Guide to Automate Your Workflow
Now we’ll step through a concrete example of automating a workflow with Azure DevOps Pipelines.
Step 1 – Set up your Azure DevOps Project & Repository
- Create a new Organization (where necessary) in Open Azure DevOps.
- Create a new Project.
- Connection with your code repository (Azure Repos Git, or connect to GitHub, Bitbucket). It forms the origin of CI.
- Choose your strategy of branch: main (production), develop, feature/ branches. Enforce quality with branch policies (e.g., Build Validation).
- Write your code, build/test infrastructure (e.g. unit test, packaging script).
Step 2 – Create your YAML Pipeline (CI)
In Azure DevOps, go to Pipelines → Create Pipeline. Choose your repository.
Select YAML; Azure may suggest a starter template based on your stack.
Example YAML for Node.js build:
trigger:
branches:
include:
main
develop
feature/*
pool:
vmImage: ‘ubuntu-latest’
steps:
– task: NodeTool@0
inputs:
versionSpec: ’20.x’
displayName: ‘Install Node.js’
– script: |
- npm install
- npm run build
- npm test
displayName: ‘Install, build & run tests’
– task: PublishBuildArtifacts@1
inputs:
PathtoPublish: ‘$(Build.ArtifactStagingDirectory)’
ArtifactName: ‘drop’
displayName: ‘Publish artifact’
Save and commit the YAML file (commonly azure-pipelines.yml) to your repo.
Run the pipeline manually or by pushing a change; you should see the build run logs.
Step 3 – Add Variables, Secrets & Agent Pools
- Under Pipelines → Library, create variable groups for environment-specific values.
- For sensitive values (API keys, connection strings), mark variables as secret.
- Decide whether you’ll use Microsoft-hosted agents (convenient) or self-hosted agents (for custom requirements). Agent pools allow scaling.
Step 4 – Define CD Stages for Deployment
Extend your YAML pipeline to include CD stages. For example:
stages:
– stage: Build
jobs:
– job: BuildJob
steps:
… (build steps here)
– stage: Dev
displayName: ‘Deploy to Dev’
dependsOn: Build
condition: succeeded()
jobs:
– deployment: DeployDev
environment: ‘dev’
pool:
vmImage: ‘ubuntu-latest’
strategy:
runOnce:
deploy:
steps:
– download: current
artifact: drop
– task: AzureWebApp@1
displayName: ‘Deploy to dev app service’
inputs:
azureSubscription: ‘your-subscription’
appType: ‘webAppLinux’
appName: ‘$(WebAppNameDev)’
package: ‘$(Pipeline.Workspace)/drop/*.zip’
– stage: Staging
displayName: ‘Deploy to Staging’
dependsOn: Dev
condition: succeeded()
jobs:
– deployment: DeployStaging
environment: ‘staging’
pool:
vmImage: ‘ubuntu-latest’
strategy:
runOnce:
deploy:
steps:
– download: current
artifact: drop
– task: AzureWebApp@1
displayName: ‘Deploy to staging app service’
inputs:
azureSubscription: ‘your-subscription’
appType: ‘webAppLinux’
appName: ‘$(WebAppNameStaging)’
package: ‘$(Pipeline.Workspace)/drop/*.zip’
Just like in the example above, the pipeline creates code and, after it is successful, sends it to DevOps and then to Staging. It is possible to have a manual approval for the Staging area.
Setting up Environments in Azure DevOps: Every environment (development, testing, production) can offer approvals or gates.
Additionally, trigger conditions can be added: for instance, the release branch is the only one that triggers deployment to Staging and Production.
Step 5 – Add Quality Gates & Approvals
- Leverage deployment gates: manual approvals, automated checks (code coverage, security scans), scheduled deployments.
- Introduce environment protection: for Production, require manual approval by designated users.
- Use integration tests or smoke tests post-deployment to validate that the deployment succeeded as expected. If validation fails, trigger rollback or block further progression.
- Add rollback conditions: automatically revert to the previous stable version if deployment fails.
Step 6 – Monitor, Report & Iterate
- Monitor pipeline runs: success/failure rates, duration, bottlenecks.
- Use logs and artefacts for traceability: which version was deployed, when, by whom.
- Optimise pipeline performance:
- Use caching for dependencies (NuGet, npm) to reduce build time.
- Parallelise independent jobs.
- Use templating and YAML reuse for maintainability.
- Iterate: refine branching strategy, triggers, agent pool usage, pipeline steps.

Best Practices & Tips
Here are some tried-and-true best practices when using Azure DevOps Pipelines to automate workflows:
- Use YAML pipelines over Classic: YAML is version-controlled, reusable, and portable.
- Keep pipelines fast and lean: Long-running pipelines slow down feedback loops. Cache dependencies, parallelise tasks, break down large jobs.
- Use templating: Extract repeated logic into templates, reuse across multiple repos/projects and DevOps.
- Secure secrets & credentials: Use variable groups with secrets and service connections (with minimal required permissions).
- Branch strategy alignment: Define triggers based on branch patterns (e.g., main, release, feature/*) to control when builds/deployments happen.
- Quality gates before production: Enforce tests, code coverage thresholds, security scans, peer reviews and manual approvals.
- Artifact versioning: Ensure your builds produce immutable, versioned artefacts to deploy.
- Deploy to multiple environments: Dev → Staging → Production with progressively tighter gates.
- Rollback & monitoring: Prepare rollback strategy, monitor post-deployment behaviour.
- Reuse and modularize: Create job/task templates, library variable groups, and common steps.
- Documentation & transparency: Keep pipeline definition readable and documented so new team members can understand.
- Use environments in Azure DevOps: Provide visibility into where deployments happened, who approved them, and maintain the lifecycle.
Example Scenario: From Commit to Production
Let’s walk through a practical scenario end-to-end:
- A developer pushes changes to feature/123-add-login.
- The pipeline triggers on feature/* and runs the CI stage: restore dependencies, build code, run unit tests, publish artifact.
- The pipeline then deploys automatically to the DevOps environment. Tests (smoke/health checks) run post-deployment.
- A pull request is opened to merge into main. Branch policy enforces that the build passed, tests succeeded, and a review is completed.
- Once the main is updated, the pipeline triggers again. Since the branch is main, the CD stage includes Dev → Staging deployment. Staging deployment has manual approval.
- QA team approves, the pipeline proceeds to deployment in the Staging environment. Integration tests, performance tests run.
- On success and approval, the pipeline deploys to Production. Post-deployment monitoring ensures application health and metrics.
- If any step fails (tests fail, deployment fails, quality gate not met), the pipeline stops, alerts the team, and a rollback is initiated if necessary.
- Every pipeline run is logged: commits, build number, environment, artefact version, approvals, duration and outcome.
This automation ensures no manual errors, faster feedback, and traceability from code to production.
Common Challenges & How to Overcome Them
Long build/test times
- Use caching of dependencies (npm, NuGet), split tests into smaller jobs, and run in parallel.
- Use smaller agents or infrastructure-as-code images optimised for your stack.
Setting up CD across multiple environments
- Use environments and approvals built into Azure DevOps.
- Parameterize environments, use variable groups, and avoid hard-coding environment names.
- Ensure deployment scripts are robust and support rollback.
Maintaining many pipelines across projects
- Use YAML templates and reuse across repos.
- Use organizational library variable groups.
- Consider pipeline orchestration: central templates, standardized triggers.
Balancing speed with quality
- Use fast feedback (CI build/tests) for feature branches; heavier gates (integration/performance tests) for release branches.
- Use manual approvals judiciously—too many slow things; too few reduces safety.
Managing credentials and security
- Use service connections with the least privilege.
- Use secret variables and key vault integration.
- Audit pipeline access and approvals.
Why Automating with Azure DevOps Pipelines is a Smart Choice
- Azure DevOps Pipelines is an indispensable part of the Azure ecosystem and offers full DevOps tooling by supporting other services like Boards, Repos, Artifacts, and Test Plans.
- Its versatility lies in the fact that it supports not only various platforms and languages but also multiple deployment targets such as Azure App Service, Kubernetes, VMs, and containers.
- The pipelines can be defined in YAML (code), which means you can have versioning, reviewability, reuse, and consistent behaviour across your organization.
- It allows the adoption of the necessary DevOps practices: CI, CD, version control, infrastructure as code, and monitoring—thereby increasing both speed and reliability.
- Manual effort is reduced and risks of human errors are mitigated by automated workflows, leading to shorter lead times for deployment and higher productivity for developers.
Summary & Next Steps
Implementing Azure DevOps Pipelines to automate your workflow is an excellent way to upgrade your process of software delivery. Gradually, through all the steps—from project setup, YAML pipeline definition, trigger, variable, environment and gate configuration, to run monitoring and pipeline optimisation—you will be able to deliver your product faster, with more reliability, and accompanied by better visibility.
Key takeaways:
- Automate the entire process from building, testing, and deployment in order to get faster, more consistent, and higher quality output.
- Utilize YAML pipelines, save them in versions, and initiate them in response to code actions.
- Perform deployment to various environments (Development, Staging, Production) with customizable gates and approvals.
- Assess and enhance: caching, parallel jobs, templating, and reuse.
- Implement the best practices: securing secrets, defining branch strategies, rollback logic, and monitoring.
For your next step:
- Create a small demo project and build a basic CI pipeline in Azure DevOps.
- Extend the pipeline with a CD stage to one environment (Dev).
- Add variable groups and secrets, and introduce branching triggers.
- Gradually expand to multiple environments and integrate tests and approvals.
- Review your pipeline metrics, iterate, and refine.
Your greatest strength in the future will be the capacity to automate the workflow with the help of the Azure DevOps Pipelines. Take this path and you will be able to enjoy faster release, superior software and more reliable deployments.
IntelliQ IT Trainings are happy to launch Azure DevOps Training that will help you to acquire the skill of maximizing your development cycles, effectively implement CI/CD pipelines, and launch your DevOps career.